
If you bought Proxy for Steam then please read carefully the following guide as it will explain you how to use the Discord commands available. These commands will create your proxy user ID and will also create your proxy data.
When you buy Proxy for Steam for the first time at Gamestrike you’ll need to go to our Discord Server to get your proxy data. Once you joined our Discord Server you must create a ticket and use the command !proxy.
Guide for using !proxy command
1.Go to #create-a-ticket
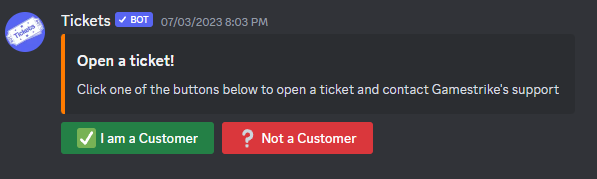
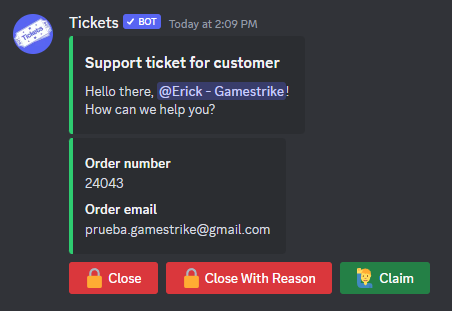
2.Open a ticket
3. Use !proxy
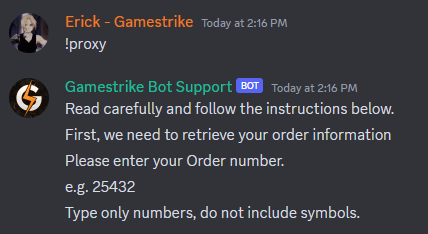
4. Enter your order number

5. Enter the email you used for that order number
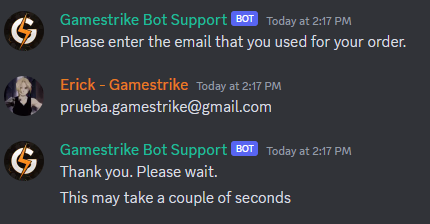
Wait a couple of seconds so the bot checks your order info.
6. Create or log into your Discord-Gamestrike account
To create a proxy you need a Discord-Gamestrike account. This account is different from your account at www.gamestrikestore.com. If you have not created one yet you must do it.
If this is the first time you use !proxy then you it’s obviaos that you’ll need to create account. So exactly as I did in this example, type ‘no’.

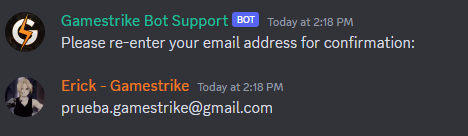
7. Enter the email for your new Discord-Gamestrike account. I highly recommend you use the same email from your order to avoid confusion in the future.

8. Re-enter the same email address
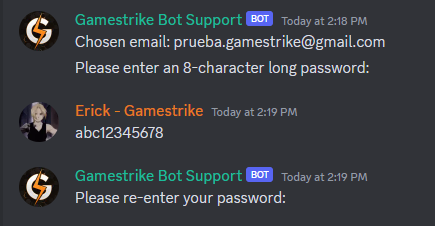
9. Enter a password, it can be anything you want as long its at least 8 character long. Make sure to remember the password as you will need it for each time you want to access your proxy data.
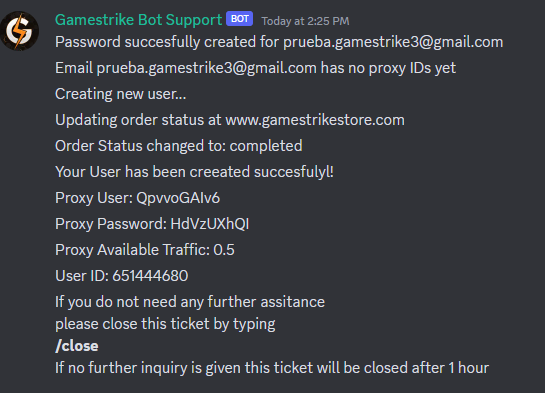
10. If everything is alright, the bot will then create your proxy user information which is: User, Password, Available Traffic and User ID. Please save your User, Password and ID as you will need them to access your proxy.
Now that you have your user ID now you can get your proxy data. For this you must use the command !getproxydata. The next guide will tell you how to use it.
Guide for using !getproxydata command
- Enter !getproxydata.
- You will now have to log into your Discord-Gamestrike account (the one you made earlier). First, enter the email of your Discord-Gamestrike account
- Then enter your password

Now the bot will start asking you what type of setting you want for your proxy session.
First, it will ask you if the proxy type http or socks5. If you intend to use this proxy for only one Steam account we recommend selecting http. Here is a comparison between the two:
| Proxy Type | Security | Functionality | Performance |
| SOCKS | Lacks encryption, good for accessing firewalled connections | General purposes like content streaming and file sharing | Great speeds, ideal for data transfer and downloading |
| HTTP | Adds security layer, detects and denies suspicious packets | Handles web browsing, filters content, caches web data | Decent load speeds, suitable for handling more requests |
4. Choose the proxy type. I suggest you choose http.
Then, it will ask you to choose the rotation type, sticky or random. If you intend to use this proxy for only one Steam account we recommend selecting sticky.
| Sticky Proxy | Rotating Proxy |
| A static proxy allows you to access the internet using a single fixed IP address. It provides good speed and bandwidth while keeping your online identity anonymous. However, you may need to rotate proxies to avoid getting blocked by websites. | A rotating proxy gives you access to a pool of IP addresses that change either at fixed intervals or randomly. This enhances security and anonymity because your requests come from different IP addresses, often from different locations. It helps prevent websites from tracking your online activities. |
5. Choose the rotation type. I suggest you choose sticky.

6. It will then ask your proxy user ID (the one the bot gave you earlier). Type yes if you have it or type no if you don’t remember it.
7. Enter your User ID. The User ID has only numbers, it does not have any letters so do not confuse it with your username.
8. Enter the country you want for the proxy. Here is a list of all countries available:
Andorra (ad) | United Arab Emirates (ae) | Antigua and Barbuda (ag) | Albania (al) | Armenia (am) | Angola (ao) | Argentina (ar) | Austria (at) | Australia (au) | Azerbaijan (az) | Bosnia and Herzegovina (ba) | Barbados (bb) | Bangladesh (bd) | Belgium (be) | Bulgaria (bg) | Bahrain (bh) | Benin (bj) | Brunei Darussalam (bn) | Bolivia (bo) | Brazil (br) | Bahamas (bs) | Botswana (bw) | Belarus (by) | Canada (ca) | Switzerland (ch) | Cote D'Ivoire (ci) | Chile (cl) | Cameroon (cm) | China (cn) | Colombia (co) | Costa Rica (cr) | Cuba (cu) | Curacao (cw) | Cyprus (cy) | Czech Republic (cz) | Germany (de) | Denmark (dk) | Dominica (dm) | Dominican Republic (do) | Algeria (dz) | Ecuador (ec) | Estonia (ee) | Egypt (eg) | Spain (es) | Ethiopia (et) | Finland (fi) | France (fr) | Gabon (ga) | United Kingdom (gb) | Georgia (ge) | Ghana (gh) | Guadeloupe (gp) | Greece (gr) | Guatemala (gt) | Guyana (gy) | Hong Kong (hk) | Honduras (hn) | Croatia (hr) | Haiti (ht) | Hungary (hu) | Indonesia (id) | Ireland (ie) | Israel (il) | India (in) | Iraq (iq) | Iran, Islamic Republic of (ir) | Iceland (is) | Italy (it) | Jersey (je) | Jamaica (jm) | Jordan (jo) | Japan (jp) | Kenya (ke) | Kyrgyzstan (kg) | Cambodia (kh) | Korea, Republic of (kr) | Kuwait (kw) | Kazakhstan (kz) | Lao People's Democratic Republic (la) | Lebanon (lb) | Saint Lucia (lc) | Sri Lanka (lk) | Lesotho (ls) | Lithuania (lt) | Luxembourg (lu) | Latvia (lv) | Libyan Arab Jamahiriya (ly) | Morocco (ma) | Moldova, Republic of (md) | Montenegro (me) | Madagascar (mg) | Macedonia, the Former Yugoslav Republic of (mk) | Mali (ml) | Myanmar (mm) | Mongolia (mn) | Macao (mo) | Malta (mt) | Mauritius (mu) | Mexico (mx) | Malaysia (my) | Mozambique (mz) | Namibia (na) | Nigeria (ng) | Nicaragua (ni) | Netherlands (nl) | Norway (no) | Nepal (np) | New Zealand (nz) | Oman (om) | Panama (pa) | Peru (pe) | Philippines (ph) | Pakistan (pk) | Poland (pl) | Puerto Rico (pr) | Palestine, State of (ps) | Portugal (pt) | Paraguay (py) | Qatar (qa) | Reunion (re) | Romania (ro) | Serbia (rs) | Russian Federation (ru) | Rwanda (rw) | Sweden (se) | Singapore (sg) | Slovenia (si) | Slovakia (sk) | Senegal (sn) | Somalia (so) | Suriname (sr) | El Salvador (sv) | Syrian Arab Republic (sy) | Togo (tg) | Thailand (th) | Tajikistan (tj) | Tunisia (tn) | Turkey (tr) | Trinidad and Tobago (tt) | Taiwan, Province of China (tw) | Tanzania, United Republic of (tz) | Ukraine (ua) | Uganda (ug) | United States (us) | Uruguay (uy) | Uzbekistan (uz) | Venezuela (ve) | Viet Nam (vn) | South Africa (za) | Zambia (zm) | Zimbabwe (zw)
9. Choose a city from the list provided or you can type random and for each session it will choose a random city. If you intend to use this proxy for only one Steam account we recommend you pick one city and do not use random.
If you chose a sticky proxy, then the bot will ask you to set how long each session should last. You can choose between minutes (1 to 60 minutes) or hours (1 to 24 hours).
10. Enter minutes or hours.
11. Enter the amount of minutes or hours you want.
12. Enter how many proxies you want the bot to create. It can create up to 10.

In this case I decided to create a 15-minute proxy. This means that every 15 minutes the proxy is going to change its IP address.
If everything went alright the bot will then give you your proxy data in the format:
hostname:port:username:password

So in this case the data is:
- hostname: ip.firststrikemail.com
- port: 12321
- username: QpvvoGAIv6
- password: HdVzUXhQI_country-ar_session-518dc564_lifetime-15m
You can now start using this proxy to access your Steam account.
REMEMBER TO READ OUR OTHER GUIDES FOUND AT THE END OF THIS POST
Guide for using !getproxy command
To avoid selecting each proxy detail by separate you can use !getproxy. It takes 7 arguments:
- Proxy type (http or stocks5). We recommend http.
- Proxy rotation (sticky or random). We recommend sticky.
- Proxy User ID. Don’t confuse it with your proxy username. User ID has only numbers and no letters.
- Proxy country, Either the name or code.
- Proxy city. Use command !getcities <country>to to get the list of cities available for that country, (e.g. !getcities argentina)
- Proxy lifetime. If you want minutes type a number between 1 and 60 followed by the letter m (e.g. 35m), or if you want hours type a number between 1 and 168 followed by the ltter h (e.g. 140h). If your proxy rotation is random then type in 0.
- Number of proxies. Number between 1 and 10. For random proxy rotation it will actually only create 1 proxy because the sessions change randomly.
If you entered everything correctly then it will ask you to enter your Discord-Gamestrike account details and if you did it right it will then give you the proxy list. The command will then look something like the following for a sticky proxy:
!getproxy http sticky 73333333 argentina cordoba 50m 1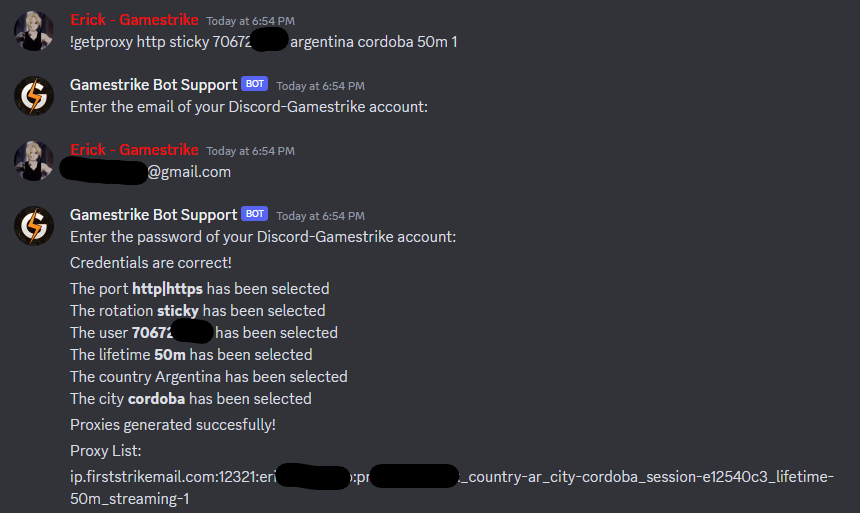
For a random proxy:
!getproxy http random 73333333 argentina cordoba 0 5 
Guide for using !getcities
It’s easy, just type !getcities followed by the country you want to get the cities from.
!getcities argentina
Guide for using !getids
After getting your proxy data, you can use the command !getids to retrieve all the ids that are linked to your Discord-Gamestrike account.
1 – Enter !getids

2 – Enter the email and password of your Discord-Gamestrike account

The bot will retrieve the information of all the ids linked to that email.
OTHER GUIDES THAT YOU MUST READ
Now that you have your proxy, please read the guides below to know how to set up your proxy and how to use it properly.
How to use your Proxy for Steam and reduce the risk of Steam Region Change
Leave a Reply